
Going off the objectives listed on the RedHat website, this guide provides the basic knowledge needed for the RHCSA exam (EX200). Official objectives here: https://www.redhat.com/en/services/training/ex200-red-hat-certified-system-administrator-rhcsa-exam
Access a shell prompt and issue commands with correct syntax
You can access Terminal either by simply going to Activities->Terminal or you can set a keyboard shortcut by opening Settings->Keyboard->Scroll to the bottom and press the “+” sign then add the following:
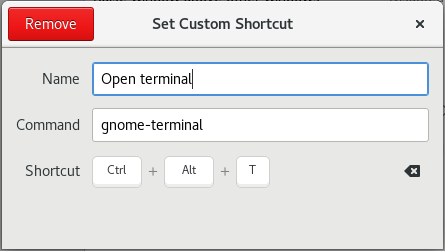
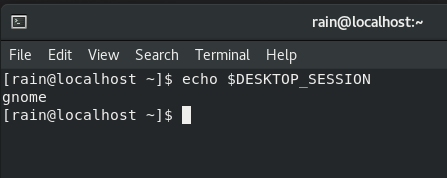
The command is “gnome-terminal” because that is the GUI that RHEL uses. You can tell what GUI type is being used by a Linux distro by running “echo $DESKTOP_SESSION”
Now you can open the terminal quickly by just pressing Ctrl+Alt+T.
Now that we have Terminal open, we want to know what shell we are working with. You can find this out by running “echo $0”
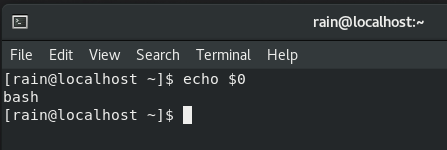
This shows we have bash as our default shell. For understanding exactly what a shell is I would read this great article on the subject: http://www.linfo.org/shell.html
Use input-output redirection (>, >>, |, 2>, etc.)
With Linux everything is file based, when a command is executed there always exist 3 files: Standard Input (STDIN), Standard Output (STDOUT) and Standard Error (STDERR).
The files also have file descriptors assigned to them like any other Linux file:
STDIN has a file descriptor of 0
STDOUT has a file descriptor of 1
STDERR has a file descriptor of 2
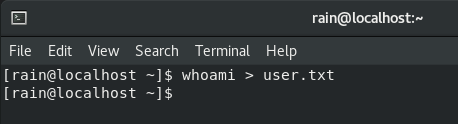
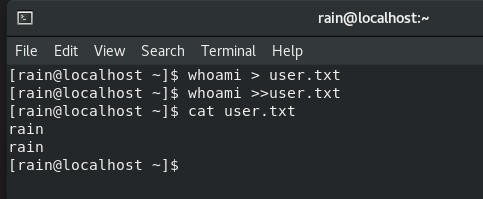
> is used for STDOUT redirection.
With this we can do things like redirect the output of the whoami command to a text file:
If user.txt already exists it will be overwritten but if we use >> it will be appended to the text file:
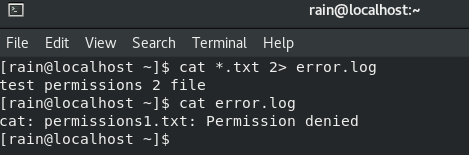
The helpful thing about the STDOUT, STDIN and STDERR file descriptors is they make it easy to redirect output. Say you wanted to track file permission errors and log it to a file, separate from the successful commands, you could do the following:
These are 2 files, the first has no granted permissions and the second file has read and write permissions granted to the owner:

Now with 2> error redirection we can write access errors to a file but still get the standard output printed to the console:
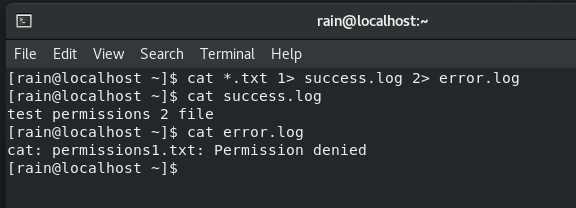
But say we wanted to have nothing printed to the console and instead separate both the STDOUT and STDERR to different files, we can do the following:
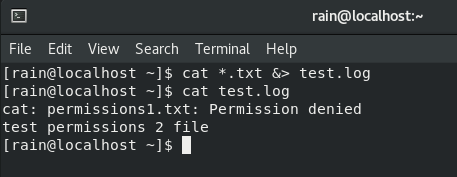
Now if we want nothing to be printed to the console and have both the STDOUT and STDERR printed to a file we can use &> to add them both to a single file:
Use grep and regular expressions to analyze text
Grep is a great tool that can sort through files, command outputs, etc. based on given criteria.
Say we have the following text file:
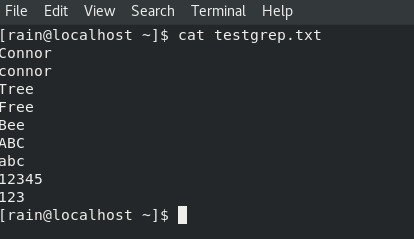
We want to search for “Free” but we want it to be case insensitive.
You would do: grep -i free testgrep.txt
![]()
Now if we didn’t have the -i flag we would get no results:
![]()
Tree and Free are both similar words only off by one character, if we want to print out any words that are off by one character we can do this:

This is telling grep to print out any words that have a beginning character with a capital letter from A through Z and end with “ree”.
Access remote systems using SSH
This is pretty simple, if there is no private key authentication required you just need to do:
ssh hostname@[ip address]
![]()
If private key authentication is required you need to do:
ssh -i privatekey hostname@[ip address]
![]()
If you need to generate a public/private ssh keypair you can use the command : ssh-keygen
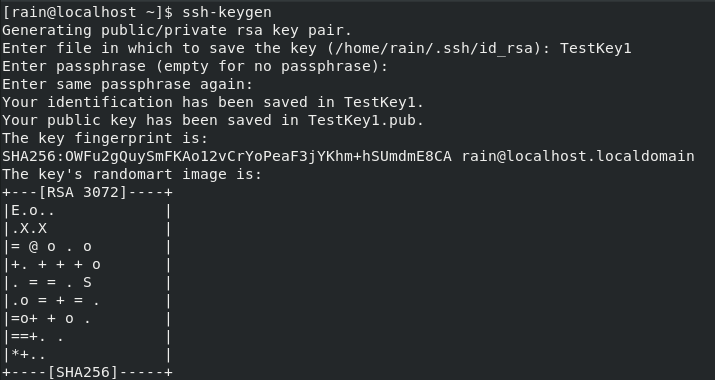
If you specify a file name the private key and public key will be saved in your home directory otherwise with none specified it will save to the .ssh/ directory.
Once you have the public key you can take it and put it into an authorized_keys file in the .ssh/ directory:
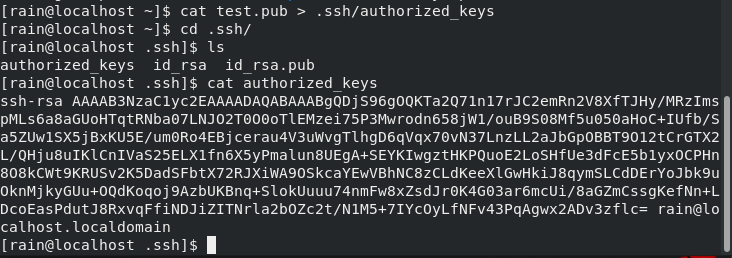
Now when you connect by ssh to the server you can just use the private key instead of password authentication.
Log in and switch users in multiuser targets
By default a RHEL 8 install will boot into graphical_target mode, to verify this run:
systemctl get-default
![]()
We want to switch this to multiuser target mode:
systemctl set-default multi-user

To get these changes to take effect you need to reboot the system, after you boot back in you will be in multi-user mode:
![]()
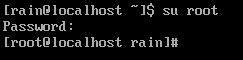
Now you can add a user, first login as root with su root
Then use useradd [username] to set the username and passwd [username] to set the password:
![]()
You can login to the new user with su [username]
![]()
Archive, compress, unpack, and uncompress files using tar, star, gzip, and bzip2
With tar you can archive multiple files into a single file, one basic command is:
tar -czvf [name].tar.gz [directory name]
This is the breakdown of the command:
The c is for creating the archive
The z is for saying you want to use gzip to compress the archive
The v is for verbose so you can see what’s happening when the command is executed

To extract the compressed archive just do the same command but with a x instead of c: tar -xzvf [filename]
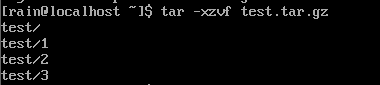
One thing you are going to run into quickly on RHEL is there is no default repos configured like other linux distos, instead redhat as a subscription service that you have to buy a license to. Since we are just testing we are going to want to setup a local repo to get around this to install any basic packages that aren’t installed by default. This tutorial explains how to do it nicely: https://www.linuxtechi.com/setup-local-yum-dnf-repository-rhel-8/
This is required to install the star package with “sudo yum install star”
Star is very similar to tar but has one function that is particularly useful, it can retain extended attributes with the following command:
star -xattr -H=exustar -c -f=[name].star [directory]
![]()
Gzip compresses one file, it is often used with tar.
gzip [file name]
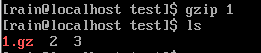
To decompress:
gzip -d [filename]

bzip has the same command structure
bzip2 [file name]
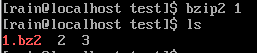
To decompress:
bzip2 -d [file name]
![]()
Create and edit text files
There are tons of way to accomplish this, some of the primary tools being nano, vim, and touch.
nano [filename]
![]()
To save the file just do Ctrl + X, y for yes, then enter to accept the file name
Vim is kind of a text editor monster to learn but is highly beneficial to learn all of its shortcuts and functionality
The basics:
- Press I to get into insert mode, this is when you can type what you need normally
- Press escape to get out of insert mode
- Type :wq to write changes to the file and save
- Type :q! to quit vim without saving the file
vim [filename]
![]()
Touch is for creating a file with no content in it:
touch [filename]
![]()
Create, delete, copy, and move files and directories
To delete files you can use rm [filename]
To delete directories you can use rm -rf [directory]
To copy files you can use cp [filename] [location]
To move files you can use mv [filename] [location]
To create directories you can use mkdir [name]
To remove directories you can use rmdir [name]
Create hard and soft links
To create a hard link do ln [filename] [link name]
![]()
To create a soft link do ln -s [filename] [link name]
Can confirm link location with ls -l [link name]

List, set, and change standard ugo/rwx permissions
Ugo/rwx means User, Group, Other and Read, Write, Execute permissions
Linux has 3 groups for permissions, user which owns the file, user groups, and all others.
To see the security permissions of a file do ls -l [filename]
![]()
These permissions are saying that the user was read and write permissions, the group has read and write permissions, and others only have read permissions.
Numerically this would equal chmod 664
The break down is:
4 is for read
2 is for write
1 is for execute
4+2 is 6 so owner has read and write permissions
Another 6 for the group for read and write permissions also
4 for others so only read access to the file.
To set permissions on a file do: chmod [value] [file]

This gives the owner, group, and others full access to the file to read, write, and execute.
Locate, read, and use system documentation including man, info, and files in /usr/share/doc
To get information about a command along with examples of how to use a command you can use
man [command name]
![]()
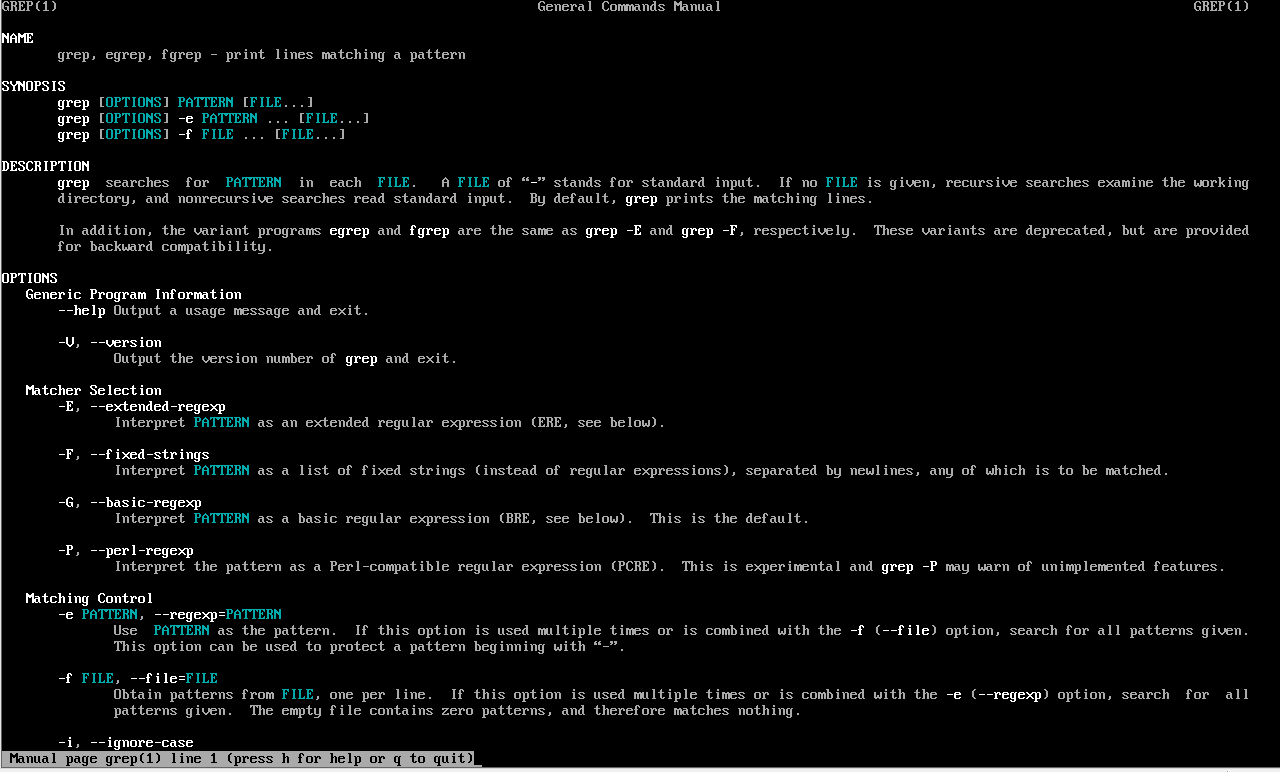
Within the man page you can scroll down with the down arrow or can search for something with /[string]
Q is used for quitting out of man.
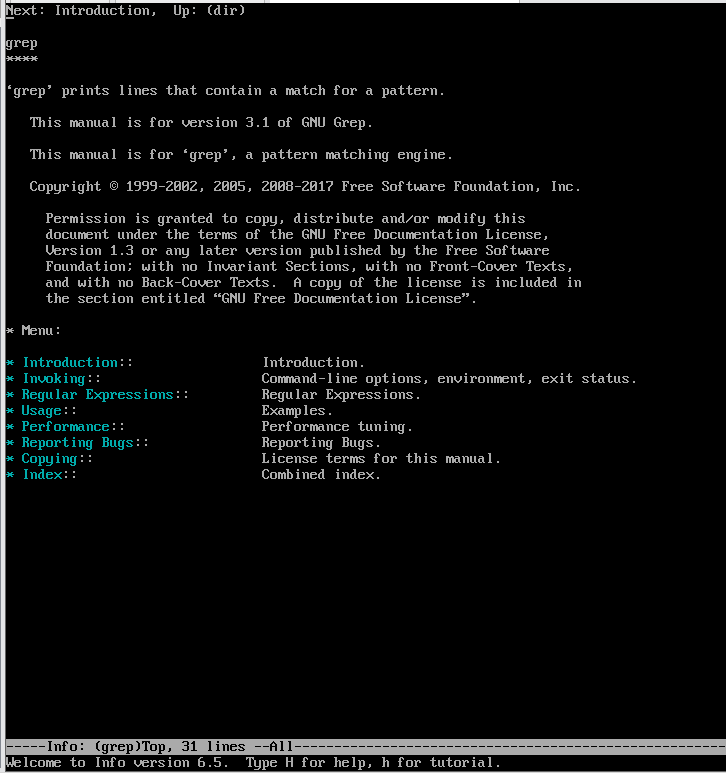
Another way to get information about a command is with info, which is very similar to man but contains more information and is less straightforward.
info [command]
![]()
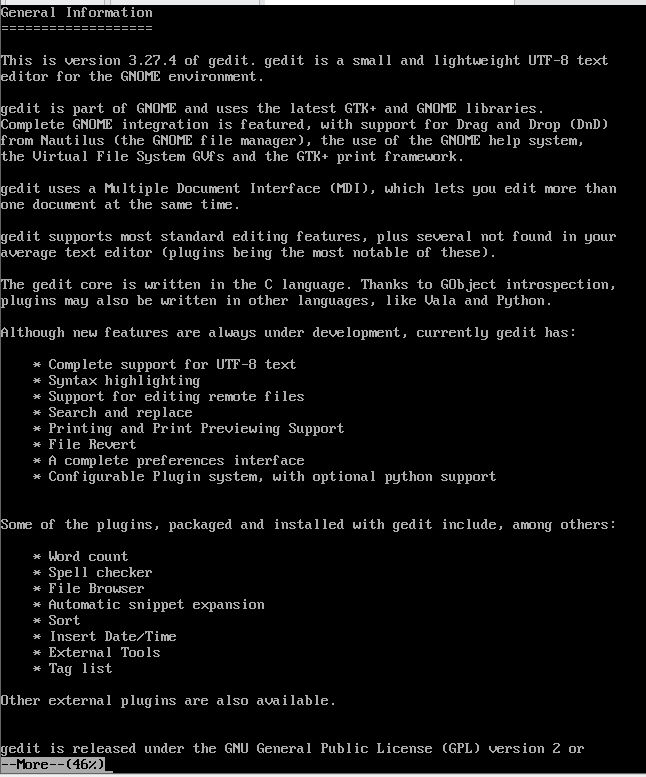
There are also loads of informational files in /usr/share/doc
Since there is a ton of directories in here I’m using ls /usr/share/doc | more so I can scroll page by page with the space bar.
![]()
After cd’ing to the command directory you can read the file with more [filename]
![]()
![]()
Boot, reboot, and shut down a system normally
To reboot a RHEL system you can simply use the reboot command
![]()
To shutdown the system immediately use shutdown -h now
![]()
To time a shutdown use shutdown [minutes]

Boot systems into different targets manually
Towards the beginning of the guide we changed the default target with the systemctl set-default command. This method required a reboot to get into the new target, however with systemctl isolate we can switch targets without the need for a reboot.
To switch into multi-user mode:
![]()
To switch into graphical mode:
![]()
Interrupt the boot process in order to gain access to a system
This is important for if you lose your root password to a system and need to regain access.
Reboot the system, as it boots up you want to press up and down on the arrow keys so you can pause the boot process at the GRUB screen:
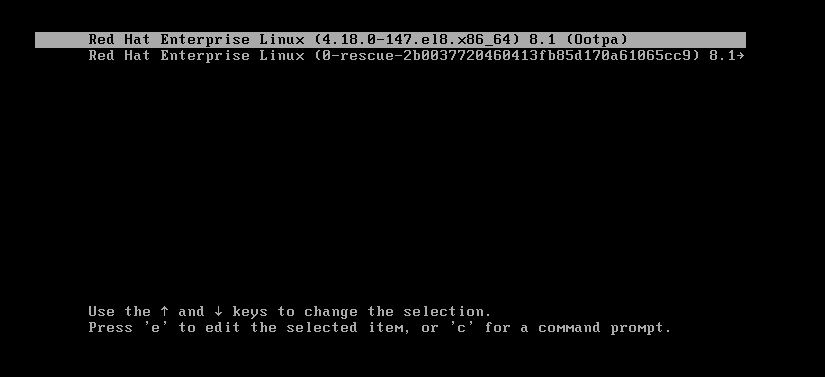
When you have your kernel highlighted, press “e” to edit it.
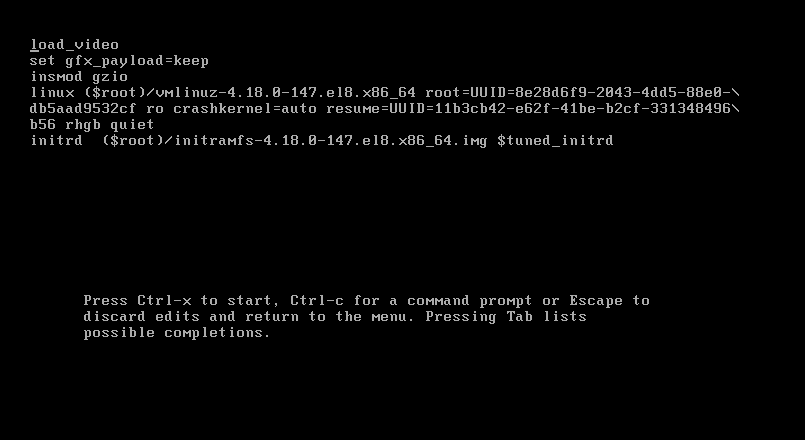
Go down to the “linux” line and press “ctrl+e” to get to the end of the line.

Delete the “quiet” and “rhgb”
![]()
Add “rd.break enforcing=0” to the end of the line:
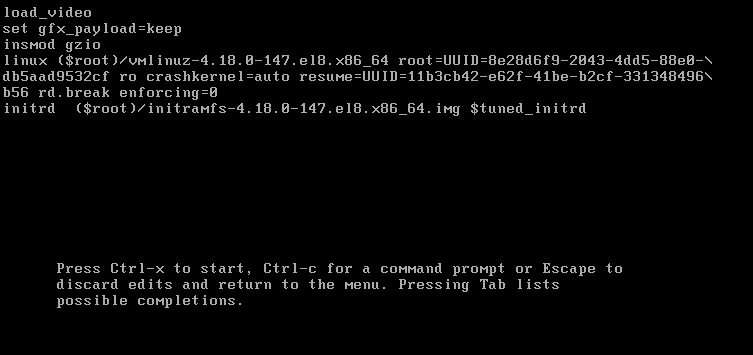
Press ctrl+x to save changes and boot
You’ll be taken the following prompt:

From here do mount -o remount,rw /sysroot
![]()
Now do chroot /sysroot
![]()
Now we can run the passwd command to change the root password

Then exit
![]()
Then logout
![]()
Login to root
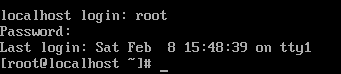
Then run restorecon /etc/shadow then reboot
![]()
Identify CPU/memory intensive processes and kill processes
To find the top processes on RHEL use the command “top”
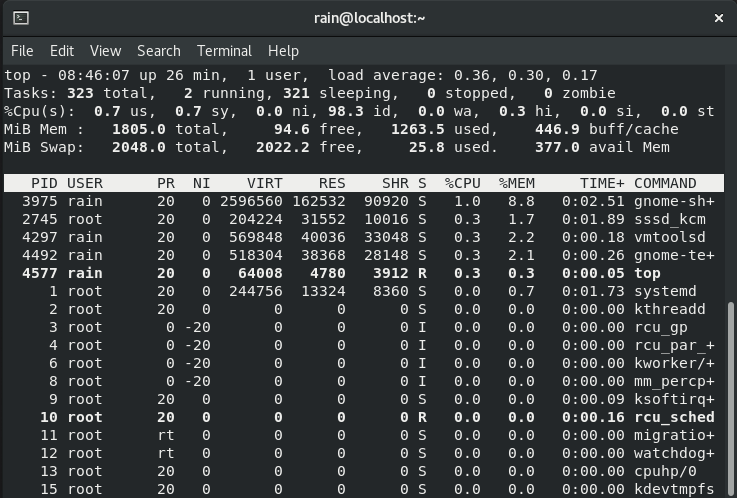
To kill a process do kill [pid] if root, otherwise use sudo kill [pid] this sends a SIGTERM signal to the process.

To find the pids of a process you can use pgrep [command]
To kill a process forcefully use kill -9 [pid] this sends a SIGKILL signal to the process.
To start a process with a different priority you can do nice -n [value from -20 to 19] process
The lower the nice value the higher the priority of the process, the higher the nice value the lower the priority of the process. AKA a process that is nicer will be set to interfere with less with programs that are less nice because the priority goes to the meaner processes 😊
To change an already running processes nice value use: renice [+ or – value] -p [pid]
Adjust process scheduling
The default process scheduling algorithm on RHEL is SCHED_OTHER
We can find what scheduling algorithm a process is using with first finding the pid
pidof -s [process]
![]()
From there we can use chrt to find the scheduling policy and priority
chrt -p [pid of process]

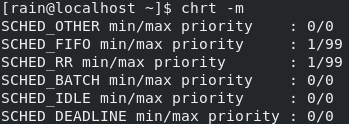
To see all scheduling policies use chrt -m
To set a process to use a different scheduling policy use chrt [flag of policy] [priority of 0 or higher if applicable] -p [pid]

Manage tuning profiles
RHEL comes with an application called “Tuned” which has different profiles for adjusting the performance of your system.
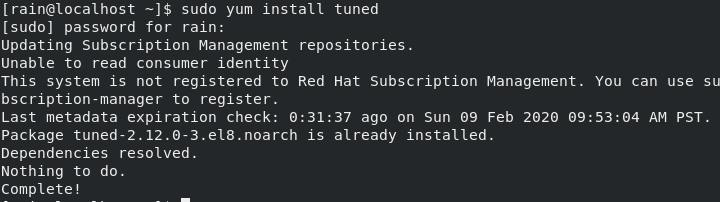
To install tuned use yum install tuned
To enable tuned use: systemctl enable –now tuned
![]()
To check what profile is running use: tuned-adm active
![]()
To list available profiles use: tuned-adm list
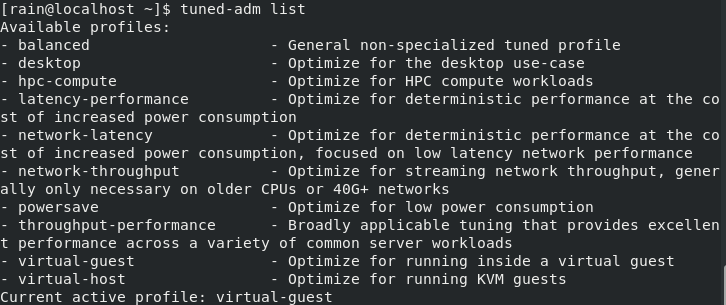
To switch to a profile use: tuned-adm profile [profile name]
![]()
To get a recommended profile use: tuned-adm recommend
![]()
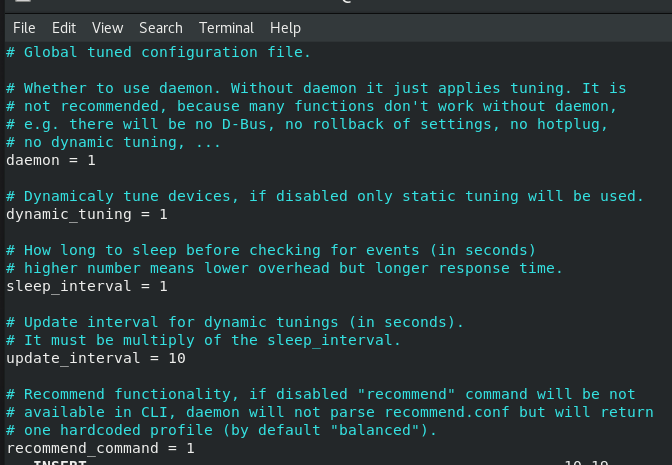
You can set your profile to be automatically tuned by editing the file at /etc/tuned/tuned-main.conf and setting dynamic_tuning from 0 to 1
![]()
You can then enable this by restarting tuned: systemctl restart tuned
Locate and interpret system log files and journals
To get the boot process duration use: systemd-analyze

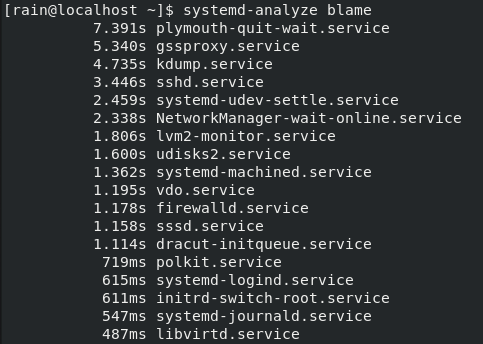
To get the time spent by each task during boot use: systemd-analyze blame
To get the contents of the system journal use: journalctl
This is probably going to give you more information than you can possible search through manually, to get journal entries related to a particular process you can do journalctl `which [process]`

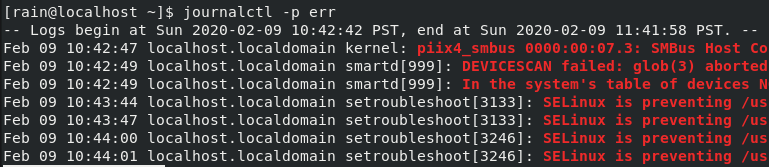
To get journalctl entries that have a classification of error, use journalctl -p err
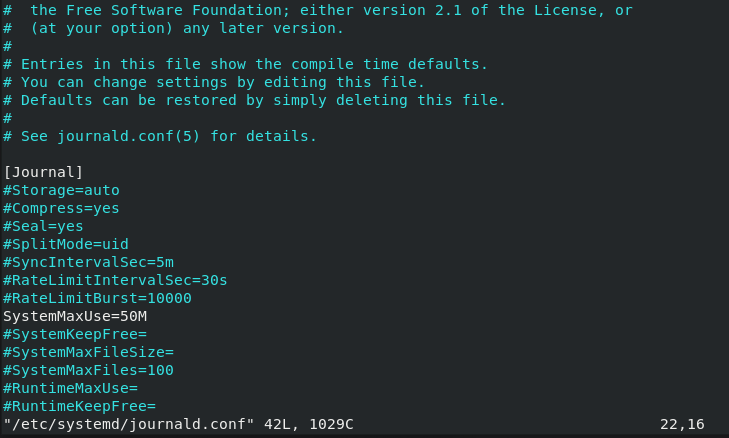
Preserve system journals
Journald logs are erased on reboot, to keep them after boot create a directory /var/log/journal then add “SystemMaxUse=50M” to /etc/system/journald.conf
![]()
To apply these changes use systemctl restart system-journald
![]()
Start, stop, and check the status of network services
Starting a service: systemctl start [service]
![]()
Stopping a service: systemctl stop [service]
![]()
To check if service is running: systemctl is-active [service]
![]()
To check if service is enabled at boot: systemctl is-enabled [service]
![]()
Enable a service to run at boot: systemctl enable [service]

Disable service from running at boot: systemctl disable [service]
![]()
To permanently disable a service: systemctl mask [service]
![]()
To re-activate a permanently disabled service: systemctl unmask [service]
![]()
Securely transfer files between systems
To copy a local file to a remote host use: scp [file] [username]@[ip address of remote server]:[file]
In my virtual environment I have a cloned VM connected to an internal network so I can test this out.

To copy all files in a directory to a remote directory use : scp [directory]/* [username]@[ip address of remote server]:[directory]

To copy a file from a remote host to your local host use: scp [username]@[ip address of remote server]:[remote file location] [destination file location]
