
Create an AWS Account
You can sign up for one here:
You can use any cloud provider as long as they offer dedicated IPs and open port access but I prefer AWS for the stability and scalability.
Launching your Server
From the AWS Console go to “EC2” then “Instances” and “Launch Instances”
I prefer Ubuntu as my distro so I’m selecting “Ubuntu Server 18.04 LTS” for Step 1 of the launch wizard.

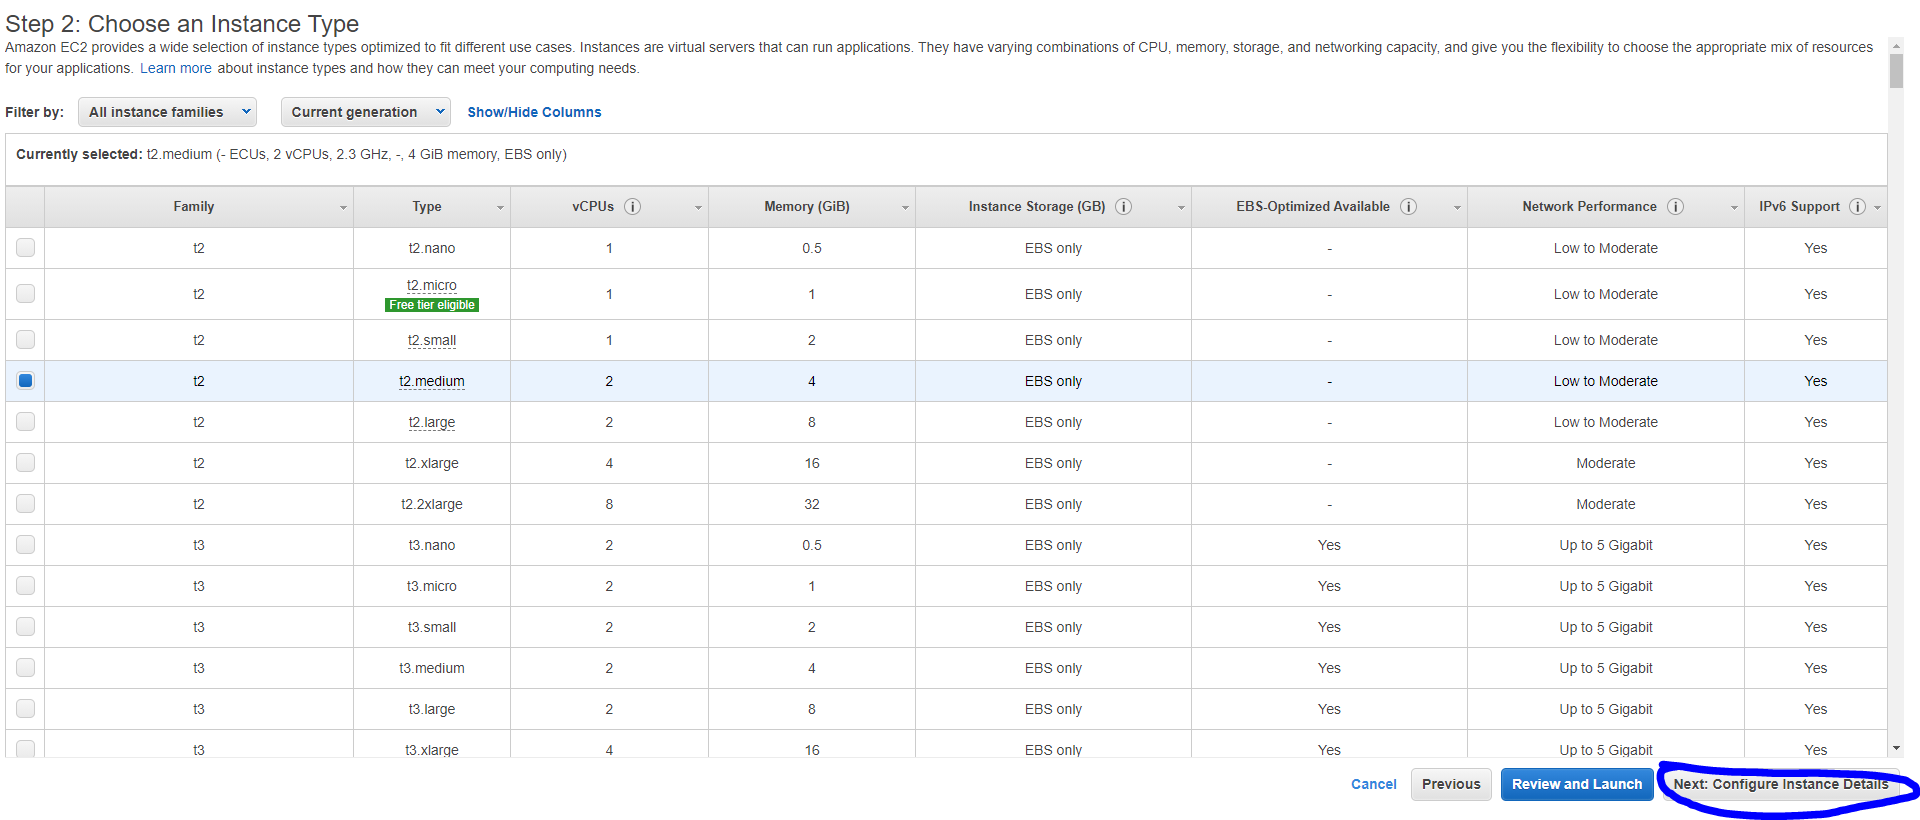
For Instance Type I’m selecting t2.medium which gives 1 virtual CPU and 4GB of RAM which costs $0.0464 per hour so $33 a month. You could probably get away with a t2.small for $16.56 a month but you’ll likely experience lag in the higher rounds.
After you have selected your instance size go to the grey “Next: Configure Instance Details” button
On Step 3: Configure Instance Details change the “Auto-assign public IP” setting to “Disable” and leave the rest as default. We want to disable this since we are going to assign a dedicated IP to the server so it doesn’t change after a reboot.

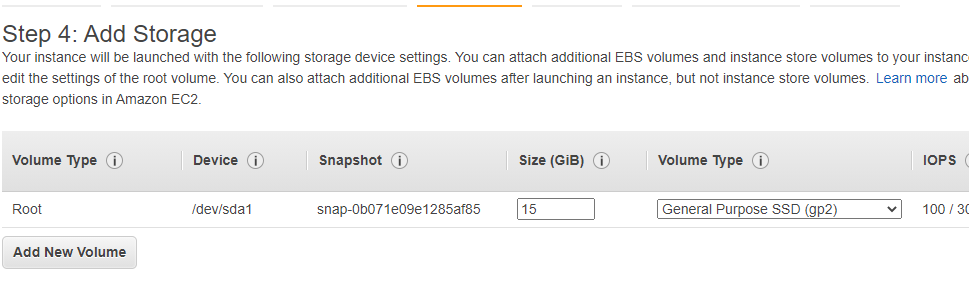
On Step 4: Add Storage change the size of the Root directory to 15GBs instead of the default 8GB.
On Step 5: Add Tags you can leave blank and move onto “Configure Security Group”
On Step: 6 Configure Security Group you are creating the access rules to your server, you are going to need a rule for access to manage your server and one for connecting to the server.
Give your Security Group a name and description (There can’t be spaces in the security group name).
For the default SSH rule change the source to “My IP”
Add a rule for “Custom UDP Rule” and have the port range be “27015” with the source from “Anywhere”, this will allow you and anyone to connect to your game server but not be able to access anything further.

After you have your Security Group set you can do “Review and Launch”
You will get a page of all the settings you have configured, you can scroll to the bottom and hit “Launch”
This will bring up a menu asking you to select or create a keypair for accessing the server. Select “Create a new key pair” and give it a name before selecting “Download Key Pair”
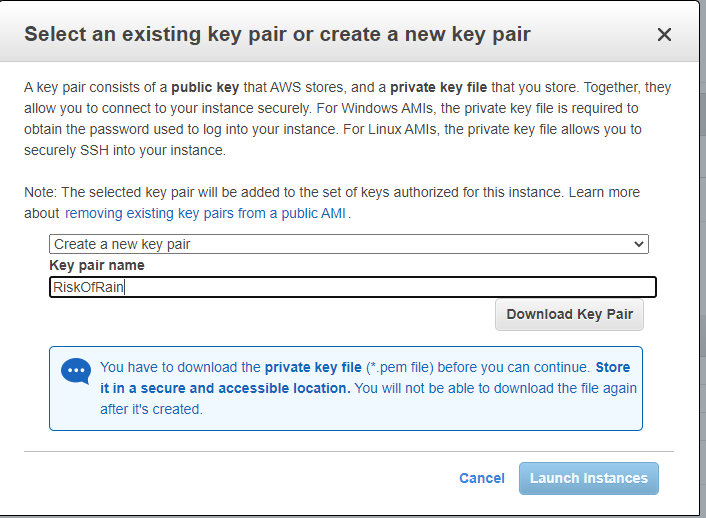
This will download a file ending in .pem to your Downloads folder. You can then proceed to launch the server.
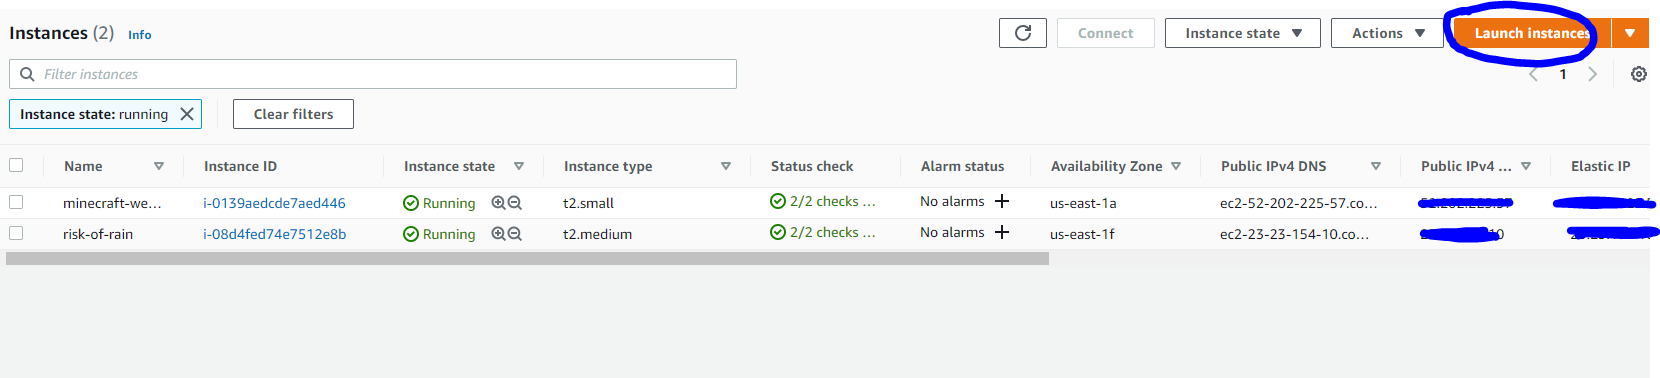
Your server may take a few minutes to launch fully. You can check the progress of it by going to EC2 then Instances. Under the “Status Check” column it will say initializing before is says “2/2 checks passed”.
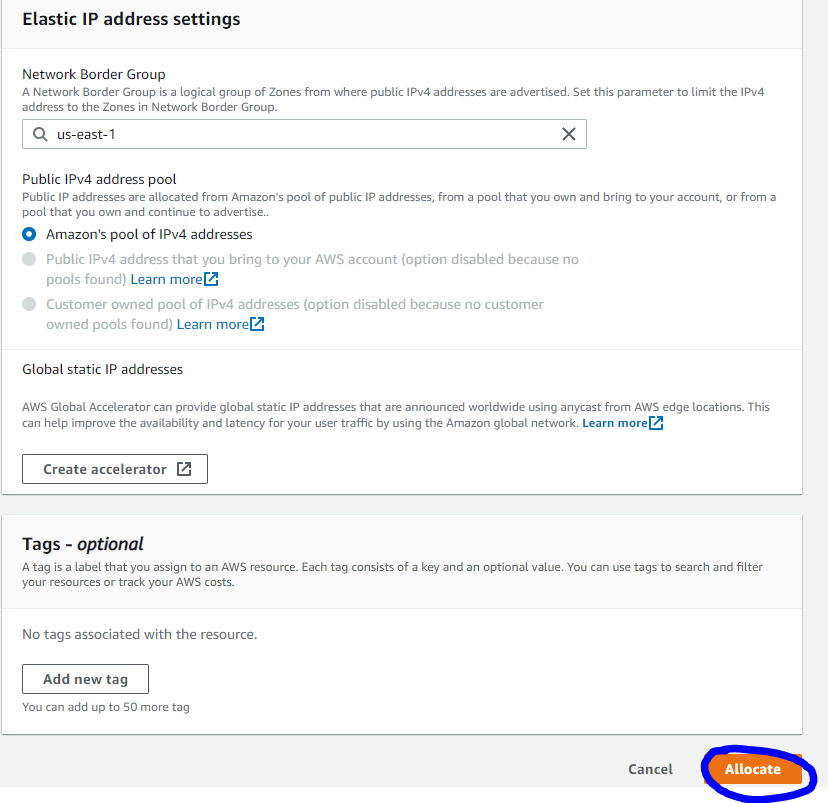
From here you can now assign an Elastic IP to your server. In the left navigation pane scroll down to select Elastic IPs.
In the Elastic IP Address menu select “Allocate Elastic IP Address”, keep the defaults and select “Allocate”
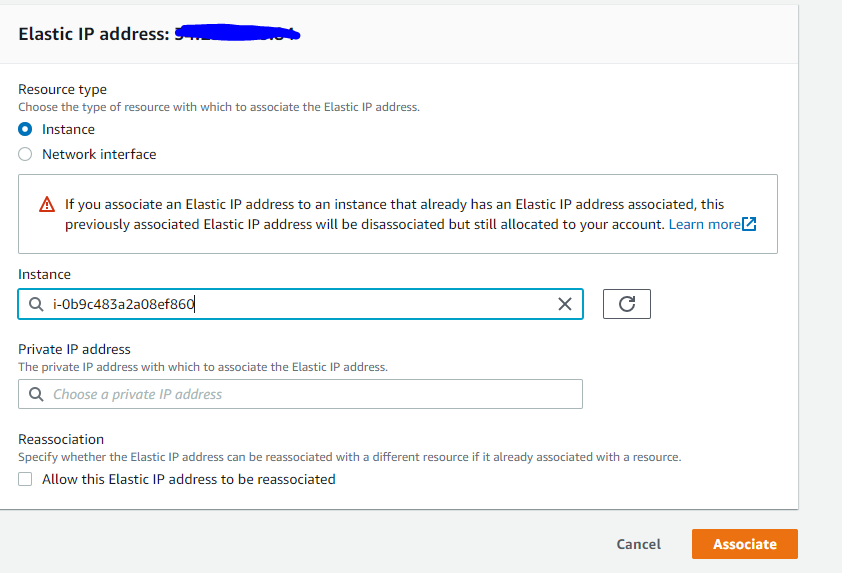
Now that you have the IP provisioned you can Select it then choose Actions->Associate Elastic IP Address
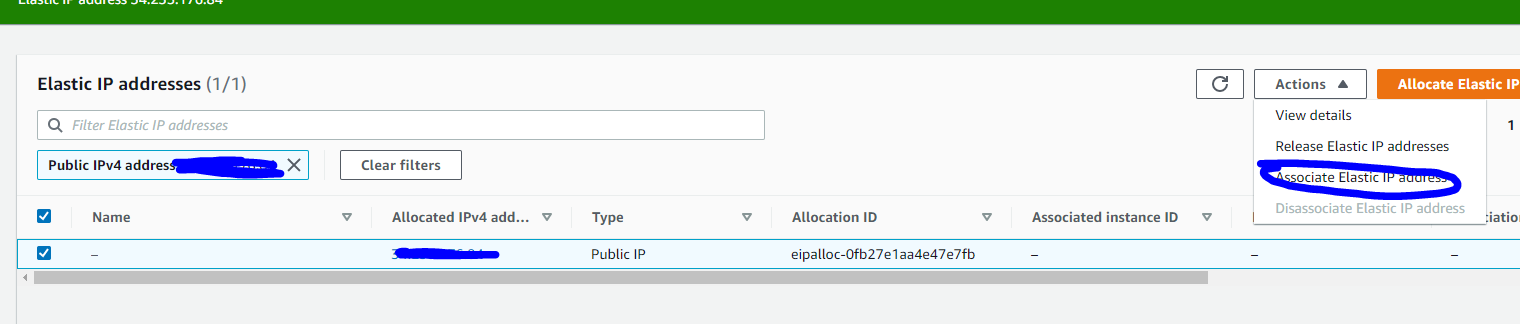
Search for your instance and select it (should only have one available) then select Associate
Accessing Your Server
Now that your server has been launched and has a public IP you can now connect to it. To accomplish this you’ll need a program for connecting over the SSH protocol. I like to use PuTTY on Windows which can be downloaded here: https://www.chiark.greenend.org.uk/~sgtatham/putty/latest.html
Once you have installed it search for PuTTYgen which was installed with it. This is needed to convert that .pem file you downloaded to the .ppk format that putty uses.
Once open select “Conversions” then “Import key” and open up the .pem file in your Downloads folder. Once it’s loaded select “Save private key”
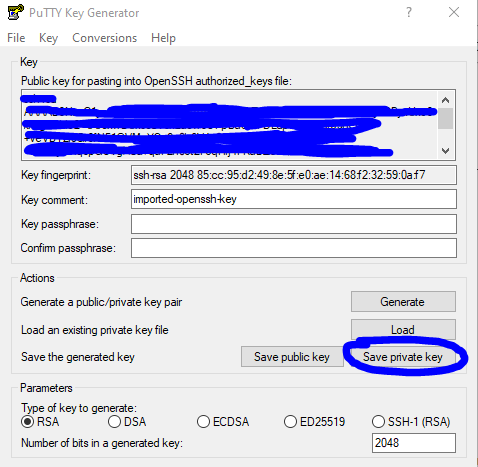
Press yes on the warning and save the new converted key.
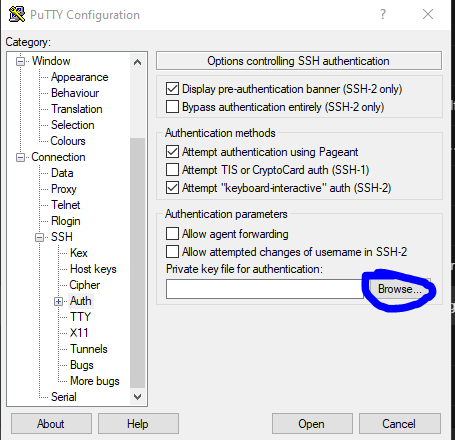
Open PuTTY now and put the Elastic IP into the Host Name box then on the left expand the SSH menu and select Auth. In that menu select the browse button and select the .ppk file you generated
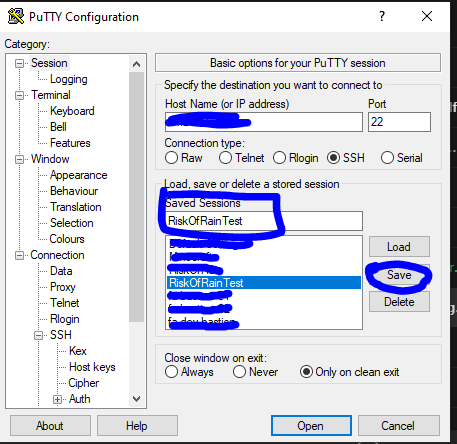
Then scroll back up and select Session on the left, type a nickname for the connection in the Saved Sessions box, then select save.
Now you can double click the name and it will connect to your server. Select Yes on the security alert to trust the host. For the username put in “ubuntu” and you’ll be connected to the server.
Installing the game server files
First thing you want to do when you connect to your server is run the command: sudo apt-get update && sudo apt-get upgrade
Type in Y and enter on the prompt to run updates to the package manager and OS software.
Then run these commands:
sudo apt-get install xvfb wine-stable lib32gcc1
sudo useradd -m steam
sudo dpkg –add-architecture i386
sudo add-apt-repository multiverse
sudo apt-get update && sudo apt-get dist-upgrade
sudo apt install steamcmd
sudo ln -s /usr/games/steamcmd steamcmd
sudo apt-get install wine32
steamcmd (this will launch the SteamCMD shell)
login anonymous
force_install_dir /home/ubuntu/server_files
@sSteamCmdForcePlatformType windows
app_update 1180760
exit
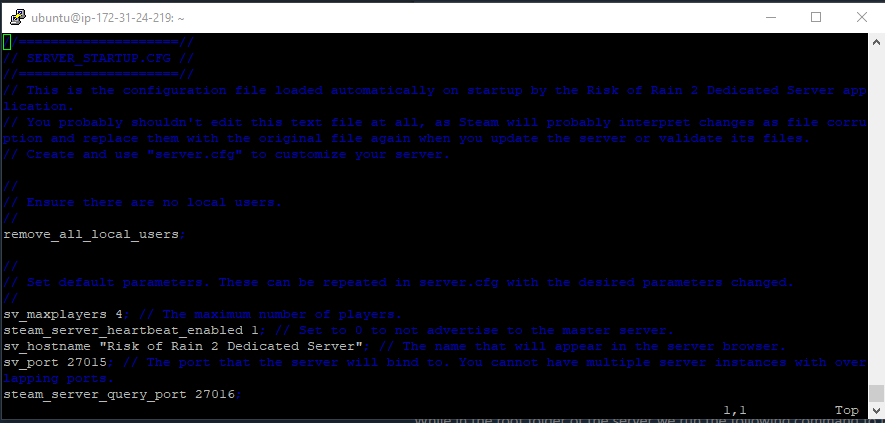
vim “/home/ubuntu/server_files/Risk of Rain 2_Data/Config/server_startup.cfg”
In this file you can adjust game options, of the most interest is probably the sv_maxplayers value which is by default set to 4 but can be changed to more. I don’t believe there is a limit coded but max I’ve seen is 16. In here you can also set a custom server name.
To edit in vim press ‘i” on your keyboard then the arrows key to navigate to the value you want to change. After you are done making the changes press “Esc” and then do “:wq” and Enter to save the changes and close.
Then do the commands:
xvfb-run wine “/home/ubuntu/server_files/Risk of Rain 2.exe”
Let this run, it will fail because of a bug but it needs to be started in order to generate the needed configs. When it fails press Ctrl+C then do the following commands to fix it’
cp “/home/ubuntu/server_files/Risk of Rain 2_Data/Config/server_startup.cfg” “/home/ubuntu/server_files/Risk of Rain 2_Data/Config/server_pregame.cfg”
cp “/home/ubuntu/server_files/Risk of Rain 2_Data/Config/config.cfg” “/home/ubuntu/server_files/Risk of Rain 2_Data/Config/server.cfg”
Now you can use the command: screen to keep the process active:
screen
xvfb-run wine “/home/ubuntu/server_files/Risk of Rain 2.exe”
(Press Ctrl+A and release, then D to disconnect from the screen session)
Connecting to your server
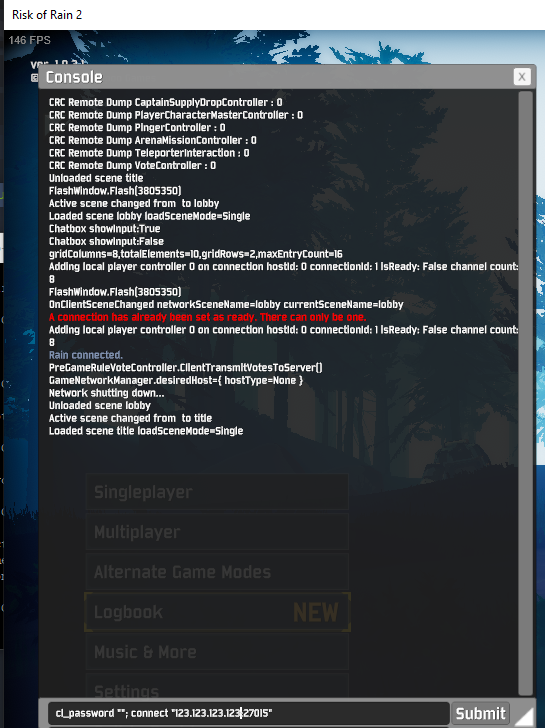
Do Ctrl+Alt+` in the Risk of Rain main menu which will bring up the dev console
To connect do cl_password “”; connect “[your server ip]”
From there you’ll be in!