
- Install VMWare player: https://my.vmware.com/en/web/vmware/free#desktop_end_user_computing/vmware_workstation_player/15_0
- Get the ISO for Windows Server 2019. You can get an evaluation copy that is good for 180 days here: https://www.microsoft.com/en-us/evalcenter/evaluate-windows-server-2019
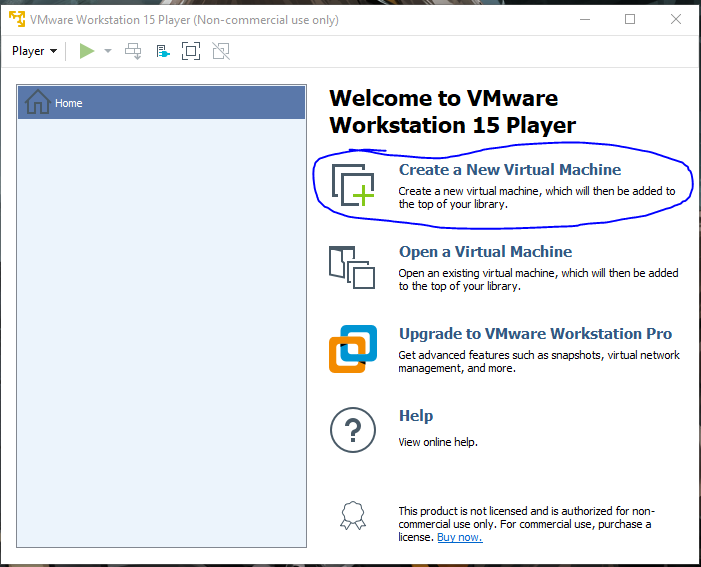
- Launch VMWare Player
- Choose “Create a New Virtual Machine”
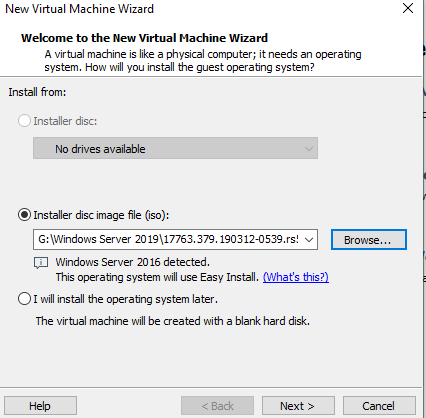
5. Select the ISO file you downloaded
6. Skip past the registration steps
7. Rename the virtual machine name to “Windows Server 2019” and choose a location for where the VM to be stored. I would recommend putting it in the same place where you have the ISO saved.
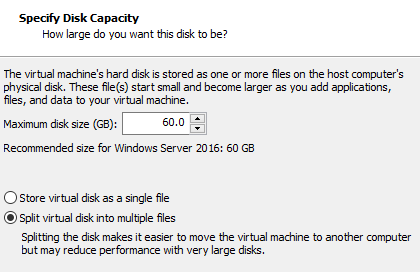
8. Keep all as default for the disk configuration.
9. Press finish on the final summary screen and your VM will start to boot into setup.
10. In the windows setup menu choose the second option “Windows Server 2019 Standard Evaluation (Desktop Experience)”
11. For installation type select “Custom: Install Windows only (advanced)”
12. There should only be one drive in the drive selection menu so just select that and continue.
13. The installation process should only take a few minutes depending on your hard drive speed
14. The VM will reboot and then it will ask you to make an administrator password
15. Login with your newly created admin account
16. In the server manager dashboard go to Manage-> Add Roles and Features
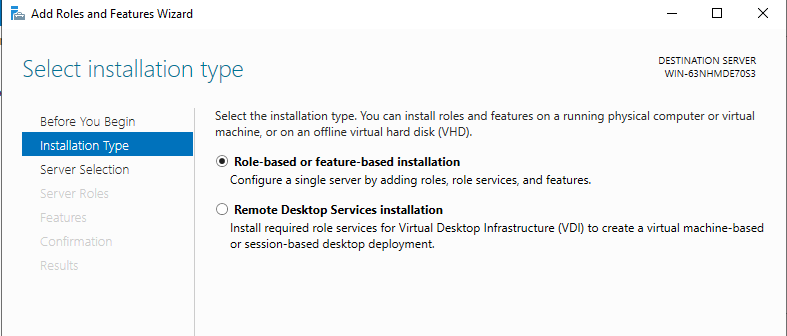
17. For installation type choose “Role-based or feature-based installation”
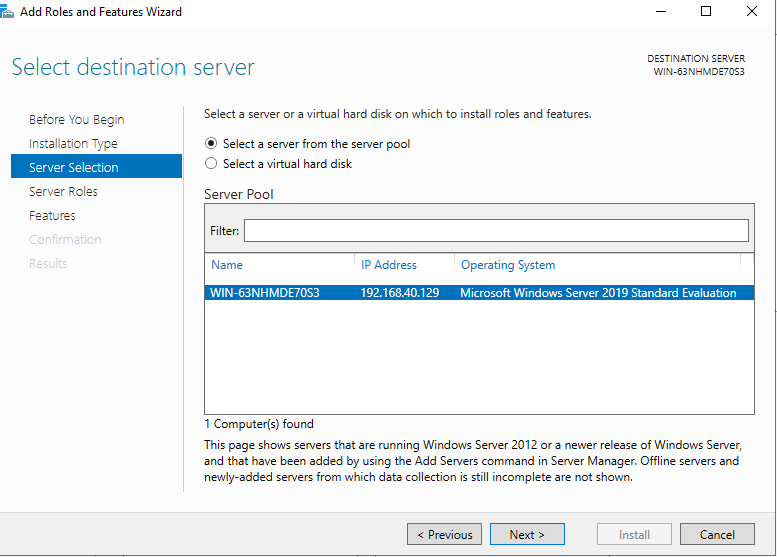
18. There is only one server in the server pool so just keep that selected and hit next.
19. For Server Roles select “Active Directory Domain Services” and “DNS Server”. You will get a warning about installing the DNS role, it will throw a caution pop-up warning about your VM not being on a static IP. You can ignore this for the purposes of installing AD but in an actual environment you want to configure your VM with a static IP.
If you want to set up a static IP you need VMWare Workstation Pro in order to create virtual networks. If you have it you can add a bridged network connection (to get access to external internet) , then a second network adapter as host only with DHCP disabled (so you can get a static IP). You probably only want to do this if you want to download software from the internet before removing the connection.
20. Let the install wizard run through, it may take a few minutes depending on your VM resources.
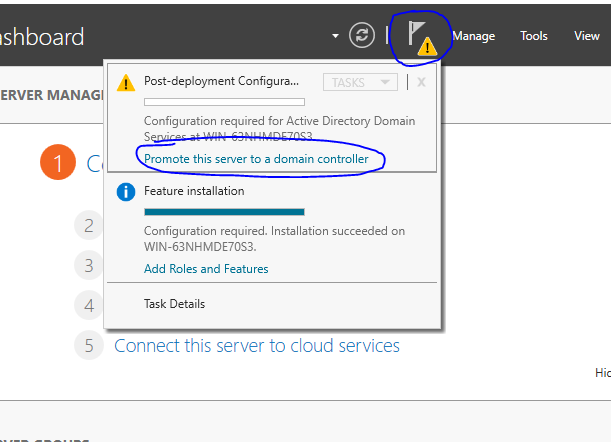
21. When this completes go to your Server Manager dashboard and you will see a yellow caution sign. Click this and select “Promote this server to a domain controller”.
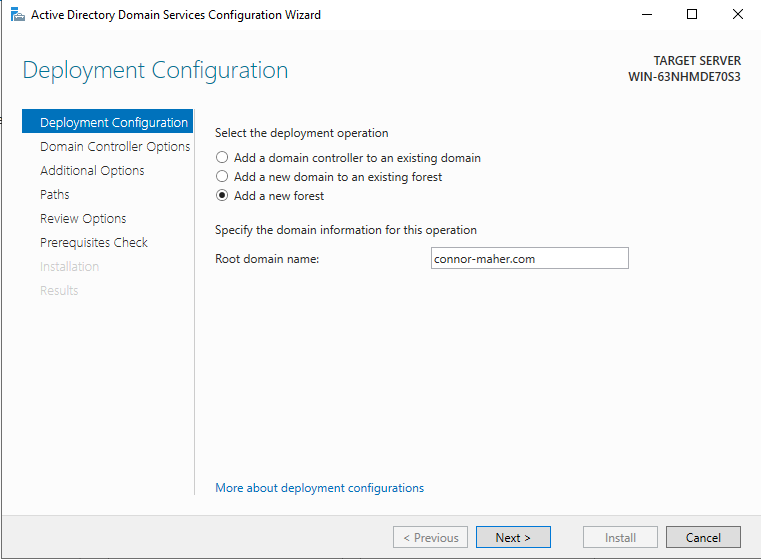
22. In the Deployment Configuration wizard select “Add a new forest”. Specify the root domain name which should be a domain you own. There is some reasoning behind this that get’s a little in depth but you can read more about that here: https://docs.microsoft.com/en-us/windows-server/identity/ad-ds/plan/selecting-the-forest-root-domain
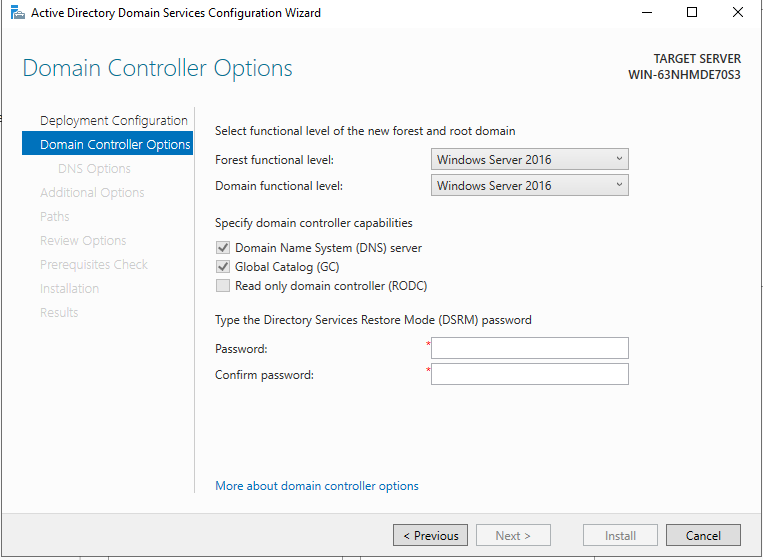
23. For the domain controller options keep the defaults but just add a Directory Service Restore Mode (DRSM) password.
24. You will get a DNS options warning talking about the authoritative parent zone not being found. It is safe to ignore this since we are setting up an AD-integrated DNS.
25. Keep the net-bios name default (you’ll probably end up disabling this anyways).
26. Keep default locations for the location of the AD DS database, log files, and SYSVOL unless you have created multiple disks or want them stored in a different folder (not recommended).

27. Follow through with the wizard for the summaries and then install. This may take 5-10 minutes and at the end your VM will reboot to finish the process.
28. You now have an AD forest setup. There is much more configuration after this but this will get you to that point so you can start building out a virtual environment.